
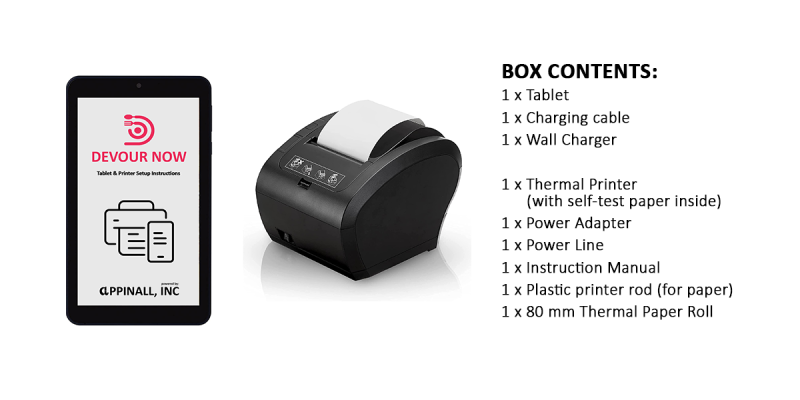

Printer Setup: Paper Loading
1. Remove your printer from the box.
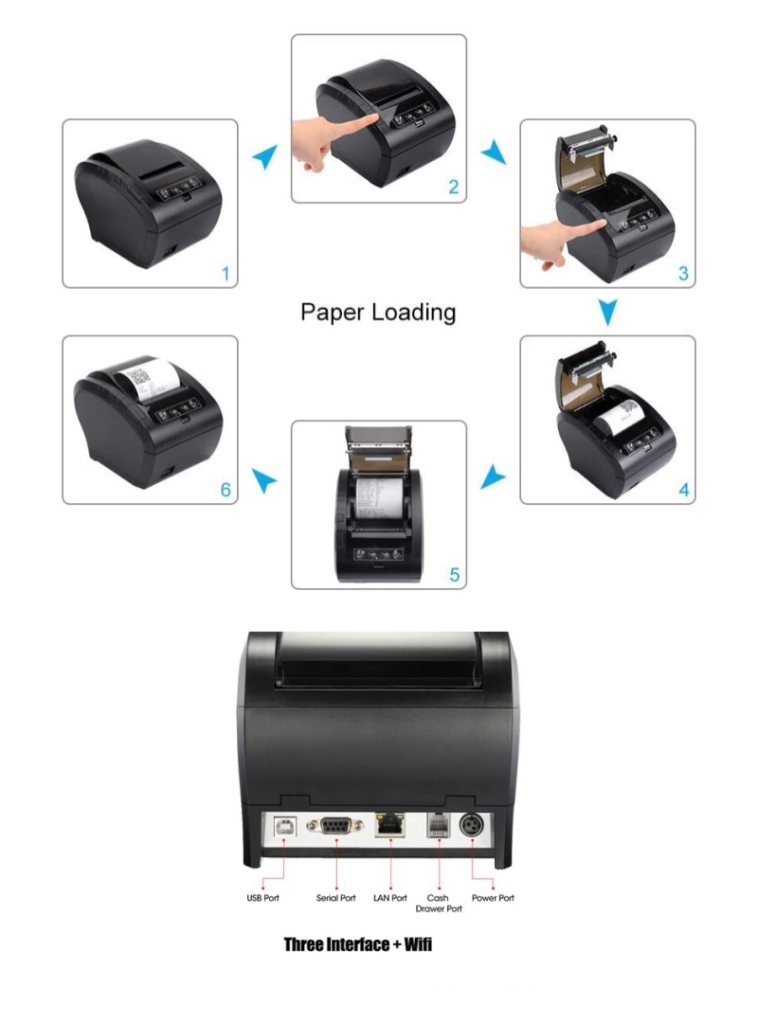
2. Press the button on the left-hand side of the printer to open the paper compartment
3. Take the plastic printer piece provided in the box and slide it through the paper leaving some to be fed out of the printer.
4. Take the roll of paper with the plastic piece sticking through the middle and place it on the ledges in the paper compartment of the printer again leaving some paper to be fed out of the printer.
5. Close the compartment.
6. Plug the Power adapter into the power line and insert it into the power port on the back of your printer.
7. Plug the power cord into a wall outlet (avoid using surge protectors if possible)
8. Turn on the power switch on the front bottom left side of the printer and it should beep twice.
Tablet Setup & Printer Bluetooth Connection
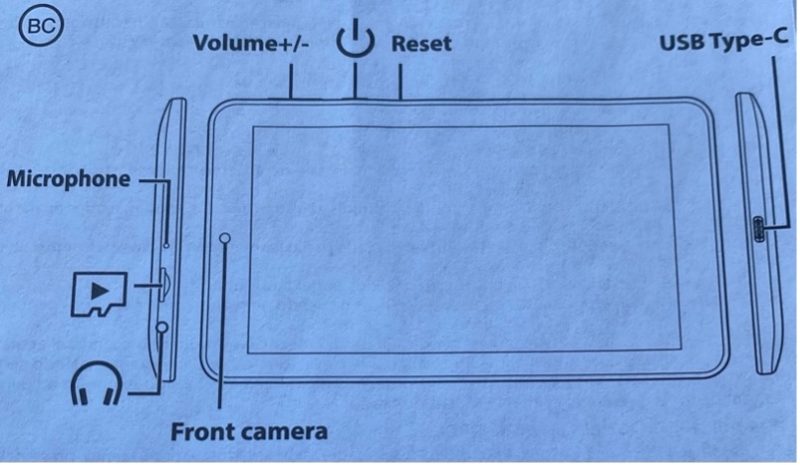
1. Turn your tablet on using the button on the right side of the device directly below the volume up and down buttons.
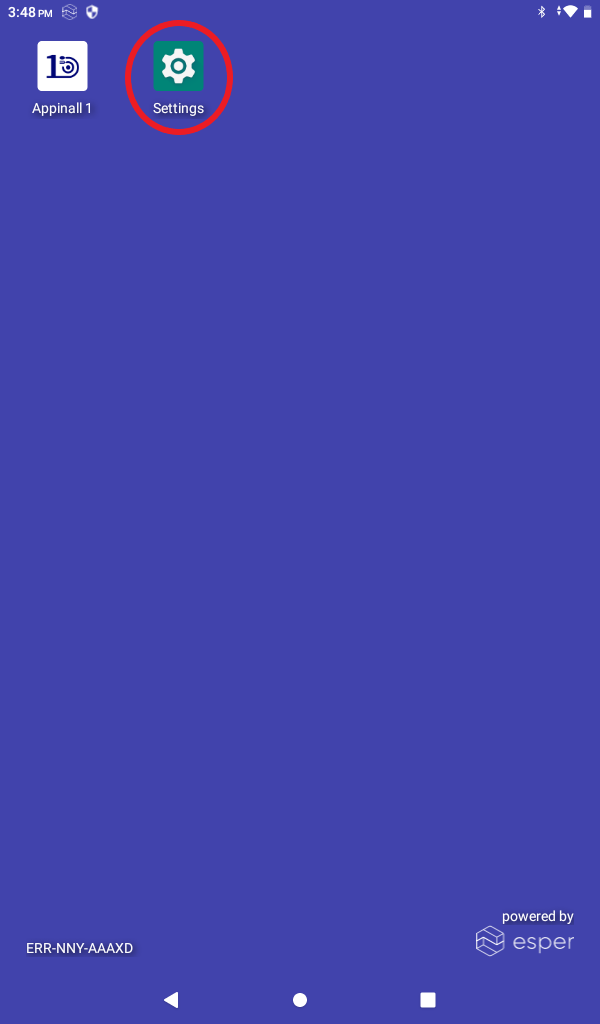
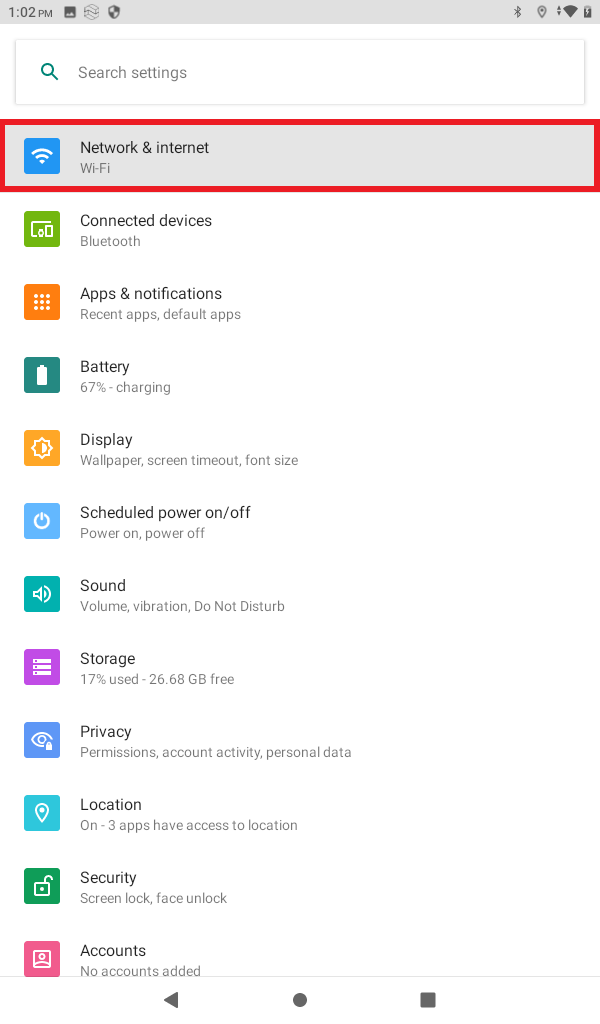
2. Once your tablet is on choose the settings icon.
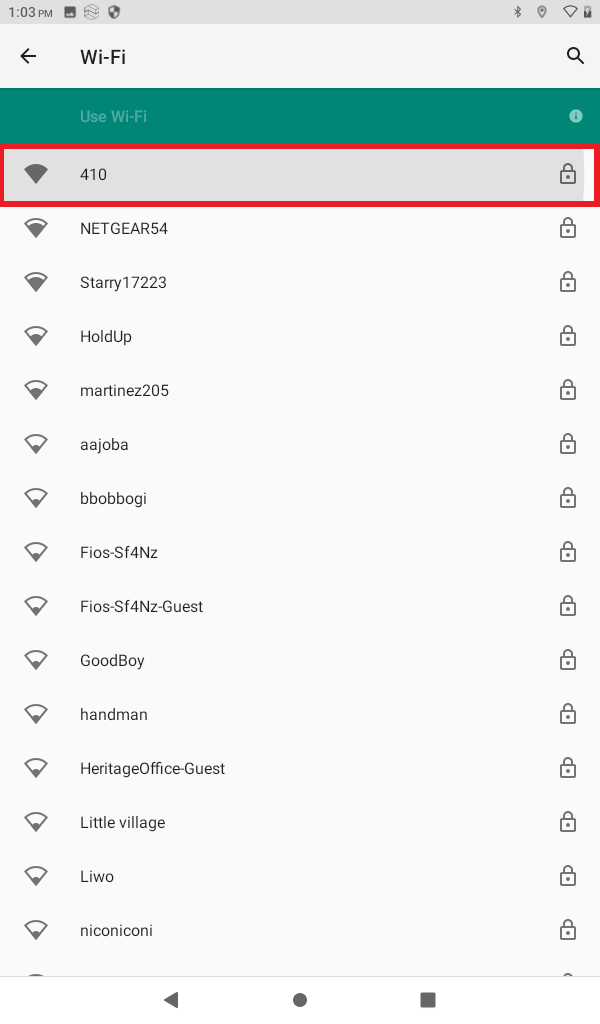
3. In settings select Network & Internet and choose the network you would like to connect to.
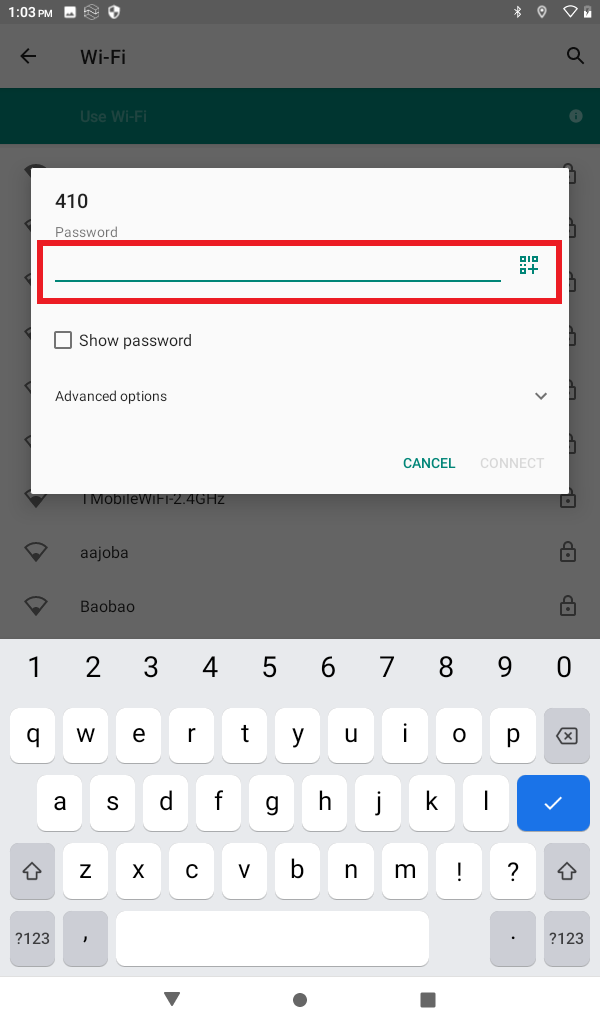
4. Enter your network password.
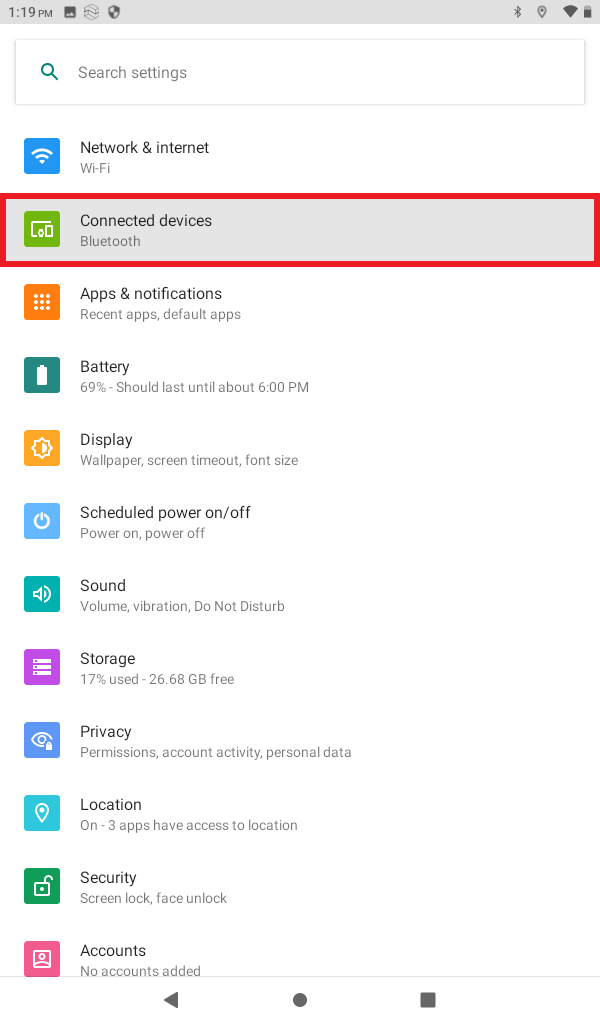
5. Once the WIFI is connected. Head back to main settings page.
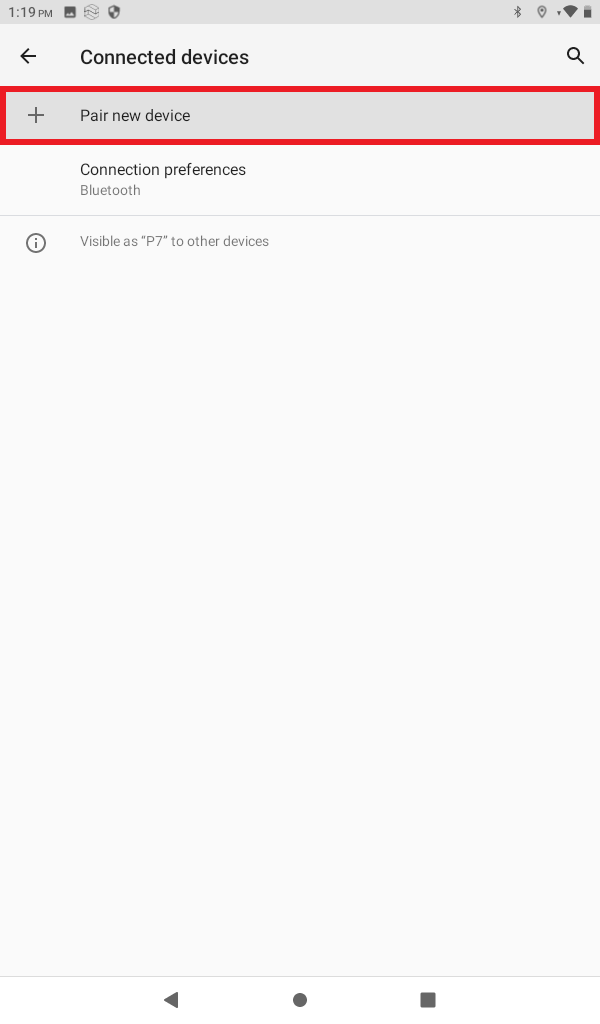
6. Select Connected Devices, then Pair New Device.
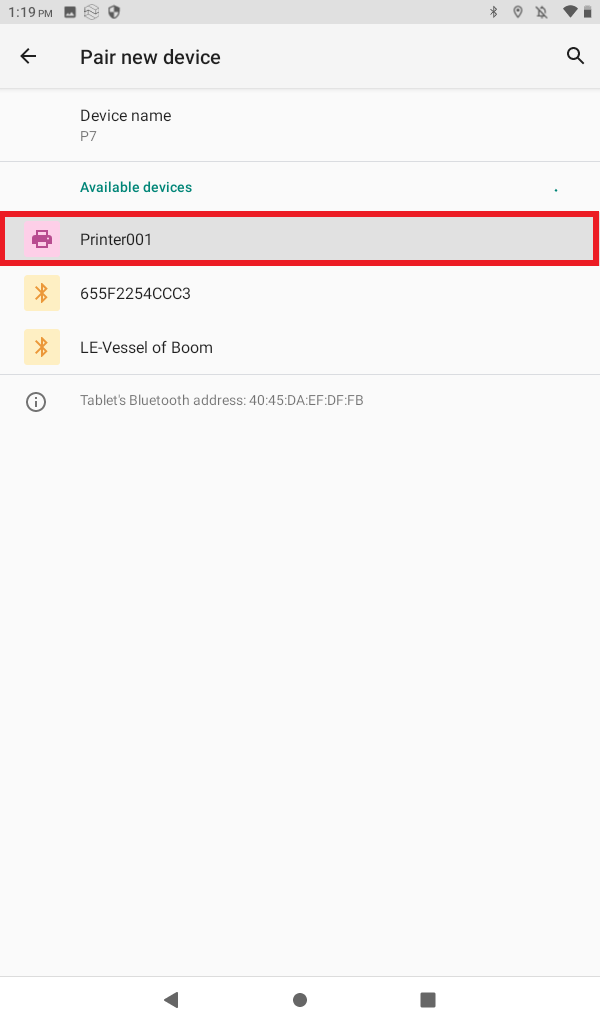
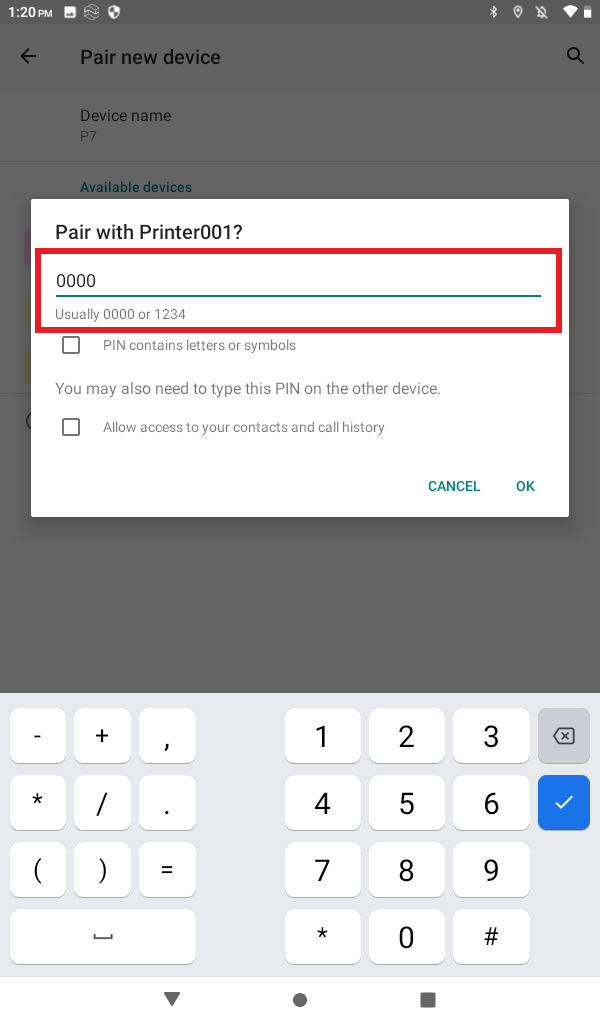
7. Select Printer001, enter the passcode 0000
Once connected, you may exit settings app.
Logging in with Credentials (Appinall)
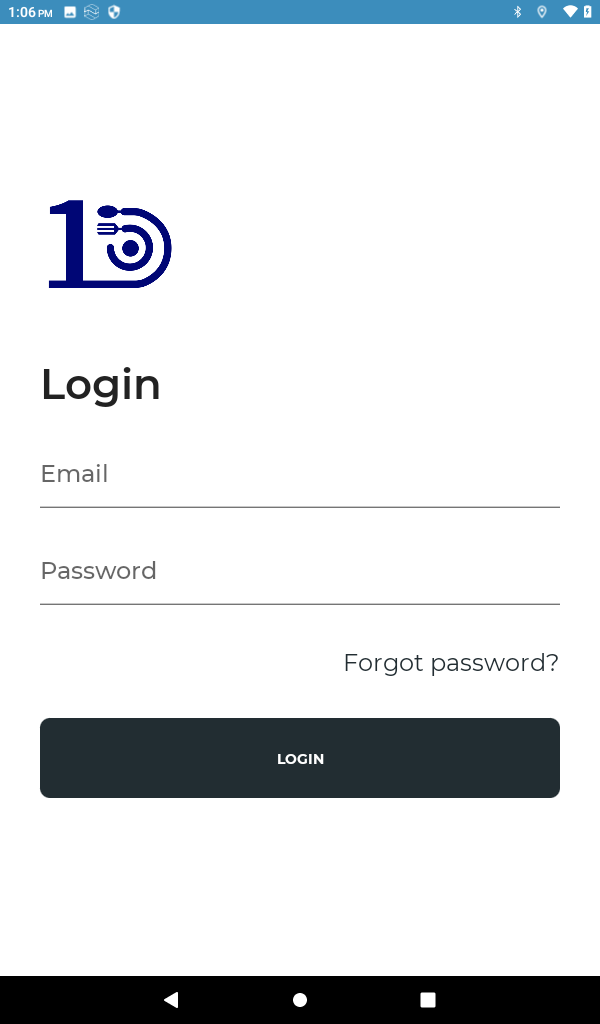
1. On the home screen, select the DevourNow application. When you open the application, it will take you to a login screen and you will login using the credentials provided to you.

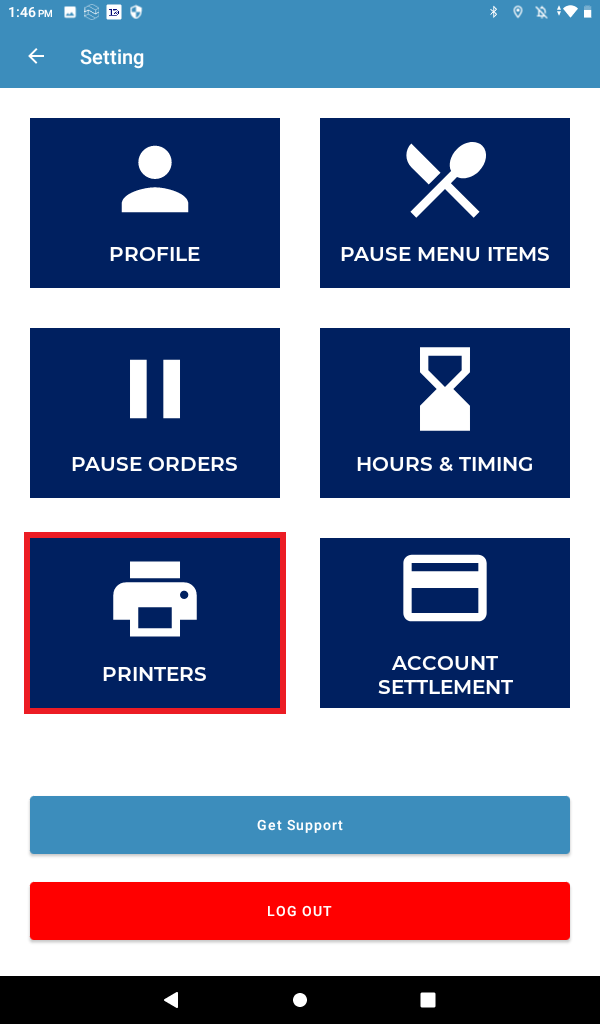
2. When you are logged in, Select the gear icon on the top right-hand corner.

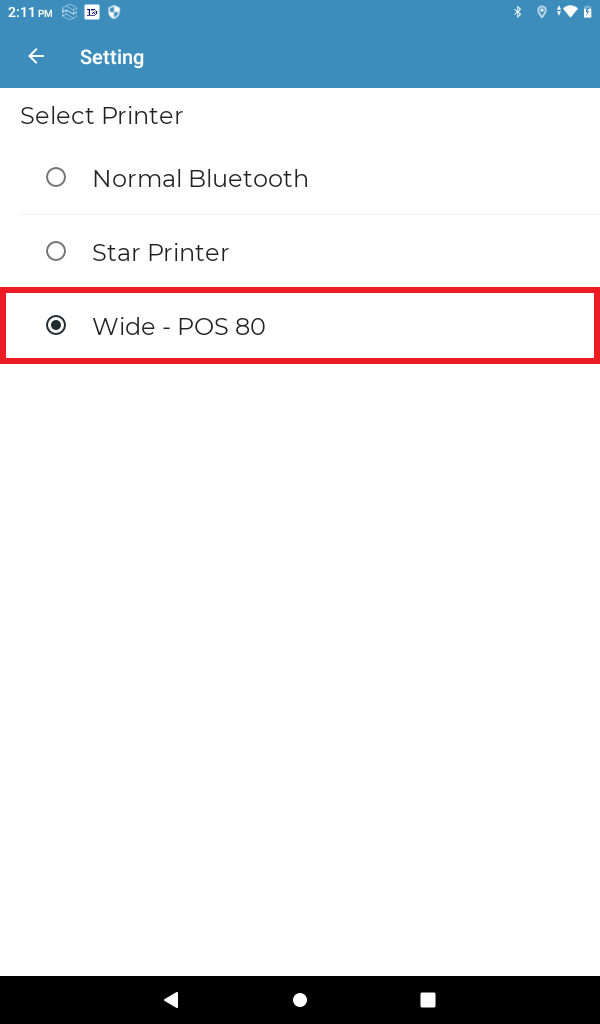
3. Select Printers, then select Wide – POS 80.
You may leave this page and head back to on the top left-hand corner icon twice.
4. Again Select Printer001, enter the passcode 0000
Once connected, you are ready to receive orders and print them.